[Check Latest Arrivals frosted glass spray on Amazon.]
# Frosted Glass Spray: A DIY Guide to Privacy & Style in 2026
Ready to transform your windows and surfaces with a touch of elegance and privacy? Frosted glass spray is the answer! Whether you’re looking to enhance your home decor, add a layer of privacy to your bathroom, or create a unique design, this DIY guide will walk you through everything you need to know about using frosted glass spray in 2026. No need for expensive professional services – you can achieve amazing results at home with the right techniques and products. Let’s dive in!
[Explore Top Rated frosted glass spray on Amazon.]
## Why Choose Frosted Glass Spray?
Frosted glass spray offers a fantastic alternative to traditional window films or etching methods. It provides a semi-transparent, diffused appearance, allowing light to filter through while obscuring direct visibility. This makes it an ideal solution for various applications around your home or office. But the real question is, why frosted glass spray?
* **Privacy:** The most obvious benefit is privacy. Block unwanted views into your home or office without sacrificing natural light.
* **Style:** Frosted glass adds a touch of sophistication and elegance to any space.
* **Cost-Effective:** Compared to window films or professional etching, frosted glass spray is a budget-friendly option.
* **DIY-Friendly:** No special skills or tools are required. It’s a simple and straightforward process that anyone can do.
* **Versatility:** Use it on windows, mirrors, shower doors, glass tables, and more!
[Explore Top Rated frosted glass spray on Amazon.]
## Step-by-Step Guide: Applying Frosted Glass Spray
Follow these easy steps to achieve professional-looking results with your frosted glass spray.
### Step 1: Preparation is Key
Before you even pick up the spray can, proper preparation is absolutely crucial. You wouldn’t start painting a room without prepping the walls, right? This is the same principle.
* **Gather Your Supplies:** You’ll need frosted glass spray, masking tape, newspaper or plastic sheeting, cleaning supplies (glass cleaner and a lint-free cloth), safety glasses, and gloves. Optionally, a razor blade scraper can be helpful for removing any stubborn residue.
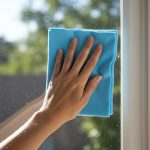
* **Clean the Glass Surface:** Thoroughly clean the glass surface with glass cleaner to remove any dirt, grime, or fingerprints. Ensure the surface is completely dry before proceeding. Any imperfections on the glass will show through the frosted finish.
* **Mask the Surrounding Areas:** Use masking tape and newspaper or plastic sheeting to carefully mask off any areas you don’t want to be frosted. This is essential to prevent overspray and achieve clean lines. Be meticulous with your masking; take your time to ensure crisp, professional edges.
* **Ventilation:** Work in a well-ventilated area or outdoors. Frosted glass spray can have a strong odor. If working indoors, open windows and use a fan to ensure adequate airflow.
* **Temperature:** Ensure the surface is between 65°F to 75°F (18°C to 24°C). Too cold, and the spray might not adhere properly. Too hot, and it can dry too quickly, leading to an uneven finish.
### Step 2: Application – The Art of the Spray
Now for the main event! Applying the frosted glass spray is surprisingly simple, but technique matters.
* **Shake the Can:** Shake the can vigorously for at least one minute before use. This ensures that the contents are properly mixed and the spray will come out evenly. Continue to shake the can periodically throughout the application process.
* **Test Spray:** Before applying to your glass surface, test the spray on a piece of scrap material (cardboard or newspaper) to get a feel for the spray pattern and application rate. This will help you avoid mistakes on your actual project.
* **Apply in Light, Even Coats:** Hold the can approximately 10-12 inches away from the glass surface and apply the spray in light, even coats. Avoid applying too much spray in one area, as this can lead to drips and runs. Overlap each stroke slightly to ensure complete coverage.
* **Multiple Coats:** For a more opaque frosted finish, apply multiple thin coats, allowing each coat to dry completely before applying the next. Follow the drying time recommendations on the product label. Usually, waiting 10-15 minutes between coats is sufficient.
* **Avoid Streaks:** Maintain a consistent distance and speed while spraying to avoid streaks or unevenness.
* **Direction:** Work from top to bottom for ease of application and less risk of drips.
### Step 3: Drying and Finishing Touches
Patience is a virtue! Allow the frosted glass spray to dry completely before removing the masking tape.
* **Drying Time:** Allow the frosted glass spray to dry completely according to the manufacturer’s instructions. This usually takes about 30 minutes to an hour, but it can vary depending on the product and environmental conditions.
* **Remove Masking Tape:** Once the spray is completely dry, carefully remove the masking tape. Peel the tape away slowly at a 45-degree angle to avoid lifting any of the frosted finish.
* **Clean Up:** If any overspray occurs, use a razor blade scraper to carefully remove it from the surrounding surfaces. Clean the area with glass cleaner.
* **Evaluate:** Once all the tape is off, stand back and look for any patchy areas. Depending on the look you are trying to achieve, another light coat might be in order.
### Step 4: Advanced Techniques (Optional)
Want to take your frosted glass to the next level? Consider these advanced techniques:
* **Stencils:** Use stencils to create custom designs on your frosted glass. Apply the stencil to the glass surface before spraying, and then carefully remove it after the spray has dried.
* **Etching Cream Look:** For a more permanent and etched look, apply a light coat of frosted glass spray followed by a thin layer of etching cream (following the etching cream’s instructions, of course).
* **Layered Effects:** Experiment with layering different colors of frosted glass spray to create unique and eye-catching effects.
[Explore Top Rated frosted glass spray on Amazon.]
## Tools for the Job: Recommended Products
To ensure you get the best possible results, here are a couple of recommended products readily available on Amazon:
### Krylon K09020 Aerosol Frosted Glass Finish Spray Paint, 11 Ounce
* **Key Features:** Fast-drying, durable, and provides a smooth, even frosted finish. Creates the look of custom-etched glass with a semi-transparent coating. Acid-free.
* **Why We Like It:** This Krylon option is a popular choice for its ease of use and consistent results. The fast-drying formula allows you to complete your project quickly, and the durable finish ensures that your frosted glass will look great for years to come. It’s also available in a wide range of colors, so you can customize your project to match your decor. The affordable price point is a fantastic benefit as well.
### Rust-Oleum 1903830 Frosted Glass Aerosol Spray, 11 Ounce, White
* **Key Features:** Creates a translucent coating for privacy, easy to apply, and ideal for indoor use.
* **Why We Like It:** Rust-Oleum is a trusted brand in the DIY world, and their Frosted Glass Aerosol Spray is no exception. This product offers excellent coverage and creates a beautiful translucent coating that’s perfect for adding privacy to windows, shower doors, and other glass surfaces. Easy to apply and relatively quick drying, this spray can transform plain glass surfaces in a matter of hours. It’s particularly well-suited for situations where maximum privacy is desired while still allowing light to filter through.
These are two great options, but with the rise of popularity in the last few years, there are many other options to choose from!
[Explore Top Rated frosted glass spray on Amazon.]
## Pro-Tips / FAQ Section
Here are some common questions and helpful tips to ensure your frosted glass project goes smoothly:
* **Q: How do I remove frosted glass spray?**
* **A:** Use a razor blade scraper and glass cleaner to remove the spray. You may need to apply some elbow grease and repeat the process several times. A heat gun (used carefully!) can also help soften the adhesive.
* **Q: Can I use frosted glass spray on plastic?**
* **A:** Some frosted glass sprays are specifically formulated for use on plastic, while others are not. Check the product label to ensure compatibility before applying to plastic surfaces. Testing on an inconspicuous area first is always a good idea.
* **Q: How many coats of frosted glass spray do I need?**
* **A:** The number of coats will depend on the desired level of opacity. Start with one or two light coats and add more as needed until you achieve the desired effect.
* **Q: What if I get drips or runs?**
* **A:** If you get drips or runs, allow the spray to dry completely and then use a razor blade scraper to carefully remove the imperfections. You can then reapply the spray to the affected area.
* **Tip:** Store the frosted glass spray can upside down to prevent the nozzle from clogging.
[Explore Top Rated frosted glass spray on Amazon.]
## In Conclusion: Enhance Your Space with Frosted Glass Spray
As you can see, transforming your glass surfaces with frosted glass spray is quick, easy, and budget-friendly. By following these simple steps and tips, you can achieve professional-looking results that enhance the privacy and style of your home. Embrace your inner DIY enthusiast and discover the endless possibilities of frosted glass spray! So grab a can, gather your supplies, and get ready to create a beautiful and private space you’ll love. Whether you want to add privacy to your bathroom, create a unique design on a mirror, or simply update the look of your windows, frosted glass spray is the perfect solution. The 2026 home decor trends certainly agree. Now it’s your turn to transform your space!
[Shop Budget-Friendly frosted glass spray on Amazon.]

![Miele Dishwasher Detergent: Is It Worth the Premium Price? [2026 Review]](https://www.besthomecleaningreviews.com/wp-content/uploads/2025/10/4097-miele-dishwasher-detergent-is-it-worth-the-premium-price-2026-review-150x150.png)

![Garbage Disposal Cleaning Tablets: The Ultimate Buying Guide [2026]](https://www.besthomecleaningreviews.com/wp-content/uploads/2025/10/3579-garbage-disposal-cleaning-tablets-the-ultimate-buying-guide-2026-150x150.png)