[Check Latest Arrivals grout cleaner tile floors on Amazon.]
# How to Deep Clean Grout on Tile Floors: A Step-by-Step Guide
Is your tile flooring losing its luster because of dirty, stained grout? Don’t worry; you’re not alone! Grout, that porous material between your tiles, is a magnet for dirt, grime, and mildew. But with the right approach and a little elbow grease, you can restore your grout to its former glory. This comprehensive, step-by-step guide will show you exactly how to deep clean grout on tile floors, leaving them sparkling clean and revitalized. Get ready to say goodbye to dingy grout and hello to fresh, clean floors!
[Explore Top Rated grout cleaner tile floors on Amazon.]
## Step 1: Gather Your Supplies
Before you dive in, it’s essential to have all your supplies within easy reach. This will make the process smoother and more efficient. Here’s what you’ll need:
* **Grout Cleaner for Tile Floors:** Choose a cleaner specifically designed for grout. We’ll recommend a couple of our favorites later in the guide.
* **Stiff-Bristled Brush:** An old toothbrush works well for small areas, but a grout brush with a long handle will save your back for larger floors.
* **Spray Bottle:** For applying the cleaner.
* **Warm Water:** For rinsing.
* **Two Buckets:** One for clean water, one for dirty water.
* **Rubber Gloves:** To protect your hands.
* **Eye Protection:** Especially if using harsher chemicals.
* **Old Rags or Sponges:** For wiping up excess cleaner and water.
* **Optional: Knee Pads:** Trust us, your knees will thank you!
* **Optional: Vacuum Cleaner:** To remove loose debris before you start.
[Explore Top Rated grout cleaner tile floors on Amazon.]
## Step 2: Prepare the Area
Before you start scrubbing, it’s important to prepare the area. This will help the grout cleaner for tile floors work more effectively.
1. **Clear the Floor:** Remove any furniture, rugs, or other obstacles from the area you’ll be cleaning.
2. **Sweep or Vacuum:** Remove any loose dirt, dust, or debris from the tile surface. This prevents you from grinding the debris into the grout during the cleaning process.
3. **Ventilate the Room:** Open windows or turn on a fan to provide adequate ventilation, especially if you’re using a strong cleaner.
[Explore Top Rated grout cleaner tile floors on Amazon.]
## Step 3: Apply the Grout Cleaner
Now for the main event! Applying the grout cleaner for tile floors correctly is crucial for effective cleaning.
1. **Test in an Inconspicuous Area:** Before applying the cleaner to the entire floor, test it in a small, hidden area to ensure it doesn’t damage the tile or grout.
2. **Apply the Cleaner:** Spray the grout cleaner directly onto the grout lines, making sure to saturate them thoroughly.
3. **Let it Dwell:** Allow the cleaner to sit on the grout for the recommended dwell time specified on the product label. This usually ranges from 5 to 15 minutes. *Do not let the cleaner dry on the grout.*
[Explore Top Rated grout cleaner tile floors on Amazon.]
## Step 4: Scrub the Grout
This is where the elbow grease comes in!
1. **Scrub Vigorously:** Using your stiff-bristled brush, scrub the grout lines in a back-and-forth motion. Apply firm pressure to loosen the dirt and grime.
2. **Focus on Problem Areas:** Pay extra attention to areas with stubborn stains or heavy buildup. You may need to scrub these areas repeatedly.
3. **Work in Sections:** If you have a large area to clean, work in small sections to prevent the cleaner from drying out.
[Explore Top Rated grout cleaner tile floors on Amazon.]
## Step 5: Rinse Thoroughly
Rinsing is just as important as scrubbing to remove all traces of the grout cleaner and loosened dirt.
1. **Rinse with Clean Water:** Using a clean sponge and a bucket of clean water, rinse the grout lines thoroughly to remove all traces of the cleaner.
2. **Change the Water Frequently:** As the water becomes dirty, replace it with fresh, clean water.
3. **Repeat as Needed:** Rinse until the water runs clear and there is no visible residue on the grout.
[Explore Top Rated grout cleaner tile floors on Amazon.]
## Step 6: Dry the Floor
Once you’ve rinsed the floor thoroughly, it’s important to dry it to prevent water spots and potential mold growth.
1. **Wipe with a Clean Rag:** Use a clean, dry rag or towel to wipe up any remaining water from the tile and grout lines.
2. **Allow to Air Dry:** Allow the floor to air dry completely before replacing furniture or rugs. This may take a few hours, depending on the humidity in your home.
[Explore Top Rated grout cleaner tile floors on Amazon.]
## Tools for the Job
Okay, so what grout cleaner tile floors should you *actually* use? We have two strong recommendations:
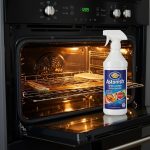
### 1. CLR Mold & Mildew Clear
* **Best For:** Tackling tough mold and mildew stains.
* **Key Features:**
* Powerful mold and mildew stain remover.
* Bleach-free formula.
* Suitable for use on various surfaces, including grout, tile, and fiberglass.
* Easy-to-use spray bottle.
* **Why We Like It:** CLR Mold & Mildew Clear is a powerhouse when it comes to removing stubborn mold and mildew stains from grout. Its bleach-free formula is safer for your home and doesn’t have that harsh chemical smell. Plus, the spray bottle makes it easy to apply directly to the grout lines. It’s a fantastic choice for bathrooms and other high-humidity areas prone to mold growth.
### 2. Grout-Eez Super Strength Grout Cleaner
* **Best For:** Overall deep cleaning and removing embedded dirt.
* **Key Features:**
* Professional-strength formula.
* Penetrates and dissolves dirt, grease, and grime.
* No harsh fumes or acids.
* Safe for color grout.
* **Why We Like It:** Grout-Eez is a heavy-duty grout cleaner that’s designed to tackle even the most stubborn dirt and grime. Its powerful formula penetrates deep into the grout lines, dissolving years of buildup. Despite its strength, it’s surprisingly gentle and safe for use on colored grout, which is a huge plus. It’s a great choice for anyone who wants a professional-level clean without the harsh chemicals.
**Why these are helpful:** Both of these cleaners have key features that simplify the entire deep cleaning process. The *spray bottles* allow for even, concentrated application on just the grout lines so you don’t waste product. And the *dwell time* helps the chemicals to really penetrate the grout and loosen the grime, so you don’t have to scrub so hard.
[Explore Top Rated grout cleaner tile floors on Amazon.]
## Pro-Tips / FAQ Section
Here are some extra tips and answers to common questions to help you achieve the best possible results.
* **What if the stains are still there?** For really stubborn stains, you may need to repeat the cleaning process or try a stronger grout cleaner. You can also try making a paste of baking soda and water and applying it to the stains. Let it sit for a few minutes, then scrub with a brush.
* **How often should I deep clean my grout?** This depends on the amount of foot traffic and the environment. In general, it’s a good idea to deep clean your grout at least twice a year.
* **Can I use bleach to clean grout?** Bleach can be effective for cleaning grout, but it can also damage some types of tile and grout, especially colored grout. It’s also harsh and can release harmful fumes. If you choose to use bleach, dilute it with water and test it in an inconspicuous area first. Always wear gloves and eye protection when working with bleach, and ensure adequate ventilation.
* **How can I prevent grout from getting dirty?** Regularly sweep or vacuum your tile floors to remove loose dirt and debris. Wipe up spills immediately to prevent them from soaking into the grout. Consider sealing your grout to protect it from stains and make it easier to clean. Use mats or rugs in high-traffic areas to reduce wear and tear.
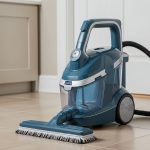
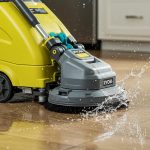
* **What about steam cleaners?:** Steam cleaners are actually an excellent option as well! They use high-temperature steam to loosen dirt and grime without chemicals. If you use a steam cleaner, make sure to follow the manufacturer’s instructions carefully. For best results, use a steam cleaner with a small nozzle attachment to concentrate the steam on the grout lines. After steaming, wipe the area with a clean cloth to remove any remaining moisture.
[Explore Top Rated grout cleaner tile floors on Amazon.]
## Encouraging Conclusion
Congratulations! You’ve successfully deep cleaned the grout on your tile floors. By following these simple steps, you can restore your floors to their former glory and create a cleaner, healthier home. Remember, a little regular maintenance can go a long way in preventing dirt and grime from building up in your grout. Now go enjoy your sparkling clean floors! You deserve it.
[Shop Budget-Friendly grout cleaner tile floors on Amazon.]