[Check Latest Arrivals grout cleaner tile floors on Amazon.]
# How to Deep Clean Grout on Tile Floors: A Step-by-Step Guide
Is your tile floor looking a little worse for wear? Are the grout lines dark, stained, and generally detracting from the beauty of your home? Don’t worry, you’re not alone! Grime and dirt love to settle into grout, making it incredibly difficult to keep clean. But with the right approach and a little elbow grease, you *can* restore your grout and make your tile floors shine again.
This comprehensive guide will walk you through a simple, step-by-step process for deep cleaning the grout on your tile floors like a pro. We’ll cover everything from gathering your supplies to applying the grout cleaner tile floors and achieving sparkling results. Let’s get started!
### Step 1: Gather Your Supplies
Before you dive in, make sure you have everything you need on hand. This will save you time and prevent frustration later. Here’s what you’ll need:
* **Grout Cleaner:** This is the most important item on the list. Look for a grout cleaner specifically designed for tile floors. There are many options available, ranging from ready-made solutions to concentrated formulas that need to be diluted. We’ll talk more about choosing the right one later.
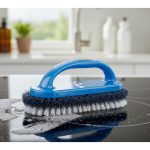
* **Stiff-Bristled Brush:** A grout brush is ideal, as it has a narrow head and tough bristles that can effectively scrub grout lines. You can also use an old toothbrush for smaller areas or edges.
* **Spray Bottle:** If you’re using a concentrated grout cleaner, you’ll need a spray bottle to apply the diluted solution.
* **Gloves:** Protect your hands from harsh chemicals and potential irritants.
* **Eye Protection:** Safety first! Grout cleaners can splash, so wear safety glasses or goggles.
* **Old Cloths or Sponges:** For wiping up excess cleaner and rinsing the grout.
* **Bucket:** For holding clean water.
* **Vacuum or Broom:** To remove loose debris before you start cleaning.
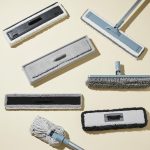
* **Optional: Scrub Brush with Handle:** For larger areas, this will save your back!
### Step 2: Prepare the Area
Before you start scrubbing, take a few minutes to prepare the area. This will make the cleaning process more effective and protect your surroundings.
1. **Clear the Floor:** Remove any furniture, rugs, or other items from the area you’re cleaning.
2. **Sweep or Vacuum:** Remove loose dirt, dust, and debris from the tile floor. Pay special attention to the grout lines.
3. **Protect Sensitive Areas:** If you’re cleaning near walls or cabinets, cover them with plastic sheeting or painter’s tape to protect them from splashes.
### Step 3: Apply the Grout Cleaner
Now comes the fun part! Applying the grout cleaner is where the magic happens.
1. **Read the Instructions:** Always read and follow the manufacturer’s instructions on your chosen grout cleaner. This is crucial for safety and effectiveness.
2. **Dilute (if necessary):** If you’re using a concentrated grout cleaner, dilute it according to the instructions on the label.
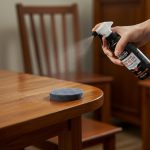
3. **Apply the Cleaner:** Spray or pour the grout cleaner directly onto the grout lines. Work in small sections to prevent the cleaner from drying out.
4. **Let it Sit:** Allow the grout cleaner to sit on the grout for the recommended amount of time. This will give it time to penetrate and loosen the dirt and grime. The instructions will provide the proper dwell time, but generally, 5-10 minutes is sufficient. *Avoid letting the cleaner dry completely.*
### Step 4: Scrub the Grout
This is where you’ll need to put in a little elbow grease.
1. **Scrub Vigorously:** Using your stiff-bristled brush, scrub the grout lines with firm, back-and-forth motions. Pay close attention to areas with heavy staining or discoloration.
2. **Don’t Be Afraid to Apply Pressure:** Stubborn stains may require a little extra effort.
3. **Work in Overlapping Strokes:** This will ensure that you cover all areas of the grout.
### Step 5: Rinse Thoroughly
Once you’ve scrubbed all the grout lines, it’s time to rinse away the cleaner and dirt.
1. **Use Clean Water:** Fill your bucket with clean water.
2. **Wipe with a Damp Cloth or Sponge:** Use a clean cloth or sponge to wipe away the grout cleaner and loosened dirt. Rinse the cloth or sponge frequently in the clean water.
3. **Rinse Multiple Times:** You may need to rinse the floor several times to remove all traces of the grout cleaner.
### Step 6: Dry the Floor
After rinsing, it’s important to dry the floor thoroughly to prevent water spots and mildew growth.
1. **Use a Clean, Dry Cloth or Towel:** Wipe the floor with a clean, dry cloth or towel.
2. **Consider Using a Fan:** If you want to speed up the drying process, place a fan in the room to circulate the air.
### Step 7: Admire Your Sparkling Grout!
Congratulations! You’ve successfully deep cleaned the grout on your tile floors. Take a step back and admire your hard work. Your floor should look significantly cleaner and brighter.
[Explore Top Rated grout cleaner tile floors on Amazon.]
## Tools for the Job
Okay, so we’ve covered the steps. But let’s talk about making the job *easier*. One product that consistently gets high marks for effectiveness and ease of use is the **Black Diamond Stoneworks Grout Cleaner**.
* **Why Black Diamond Stoneworks Grout Cleaner?** This cleaner is specifically formulated to penetrate deep into grout lines and dissolve even the toughest stains. It’s a powerful, yet safe, solution that won’t damage your tile.
* **Key Features:**
* **Acid-Free Formula:** Safe for use on most types of tile and grout.
* **Ready-to-Use:** No mixing or dilution required, saving you time and effort.
* **Powerful Cleaning Action:** Effectively removes dirt, grime, and stains.
* **Leaves No Residue:** Rinses clean, leaving your grout sparkling.
* **Key Features:**
* **Why We Recommend It:** We like that it’s ready to use, and that means you can get straight to the cleaning. The acid free formula is safe on most tiles, but *always test a small area first*
* **Alternative tools — Electric Spin Scrubber:** While a good grout brush is key, an electric spin scrubber can really speed up the process and save your arms and back. These tools come with various brush heads that are perfect for tackling grout lines. Look for one with a long handle for added reach and convenience.
[Explore Top Rated grout cleaner tile floors on Amazon.]
## Pro-Tips / FAQ Section
* **Dealing with Stubborn Stains:** For extremely stubborn stains, you can try making a paste of baking soda and water and applying it to the grout. Let it sit for a few minutes, then scrub with a brush.
* **Preventing Future Stains:** To prevent future stains, consider sealing your grout after cleaning. This will create a protective barrier that repels dirt and grime.
* **Using Vinegar and Baking Soda:** While vinegar and baking soda can be effective for light cleaning, they may not be strong enough for deep cleaning heavily stained grout. Also, be careful when using vinegar on certain types of tile, as it can damage some surfaces. *Always test in an inconspicuous area first!*
* **Can I use bleach?** Bleach can be effective, but it’s harsh. It can discolor colored grout, and is extremely harsh to breathe in while working. Use with extreme caution, and be sure to have proper ventilation. Always use gloves.
* **How Often Should I Deep Clean My Grout?** Ideally, you should deep clean your grout every 6-12 months, depending on how much traffic your floors get. Regular sweeping and mopping can help prevent buildup.
* **My grout is crumbling after cleaning, what is happening?** If you are seeing crumbling grout, it means the grout has become weak. You may have used too harsh of a cleaner, or it is simply old and needs to be replaced.
[Explore Top Rated grout cleaner tile floors on Amazon.]
## Encouraging Conclusion
Deep cleaning grout on tile floors might seem like a daunting task, but with the right tools, techniques, and a little patience, you can achieve amazing results. By following this step-by-step guide, you can restore your grout to its former glory and make your entire tile floor look brand new again. So, roll up your sleeves, grab your tools, and get ready to transform your floors. You’ve got this!
And remember if your grout simply won’t come clean, consider re-grouting. It’s a bigger project but can dramatically improve the look of your floors.
[Shop Budget-Friendly grout cleaner tile floors on Amazon.]