![Oven Cleaner Break-Up? Restore Your Relationship With This Easy Guide [2026]](https://www.besthomecleaningreviews.com/wp-content/uploads/2025/10/1595-oven-cleaner-break-up-restore-your-relationship-with-this-easy-guide-2026.png "Oven Cleaner Break-Up? Restore Your Relationship With This Easy Guide [2026] 1")
[Check Latest Arrivals break up oven cleaner on Amazon.]
# Oven Cleaner Break-Up? Restore Your Relationship With This Easy Guide [2026]
Okay, let’s face it: that beautiful oven you envisioned in your kitchen has become a burnt, greasy nightmare. And the worst part? The oven cleaner you tried just made it worse! You’re not alone. Many of us have experienced the frustration of oven cleaner gone wrong – whether it’s a lingering chemical smell, a sticky residue, or, heaven forbid, damage to the oven itself. But before you banish yourself to a lifetime of microwave meals, there’s hope! This easy guide will help you understand why your oven cleaner relationship soured and, more importantly, how to restore your oven to its sparkling glory. Welcome to your oven cleaning intervention!
[Explore Top Rated break up oven cleaner on Amazon.]
## Why Did My Oven Cleaner Break Up With Me? (Common Oven Cleaning Problems)
So, why did your oven cleaning efforts go sideways? It’s usually one of a few common culprits. Let’s break down (pun intended!) the most frequent reasons why oven cleaners can leave you less than satisfied.
* **Using the Wrong Type of Cleaner:** Not all oven cleaners are created equal. Some are formulated for self-cleaning ovens, while others are best for conventional ovens. Using the wrong type can lead to damage or ineffective cleaning. Stronger chemical-based cleaners can damage the interior finish on newer ovens, and some self-cleaning ovens can sustain damage from continuous use of chemical cleaners.
* **Improper Application:** Instructions are your friend! Failing to follow the instructions precisely can result in uneven cleaning, residue build-up, or even damage to the oven. Did you shake the can well enough? Did you apply it to a *cold* oven, as directed? Skipping steps almost always leads to trouble.
* **Insufficient Ventilation:** Oven cleaners release harsh chemicals. Poor ventilation can lead to strong odors, respiratory irritation, and even health problems. Always ensure adequate ventilation by opening windows and doors. A respirator or proper mask, if the fumes bother you, make the job even safer.
* **Leaving the Cleaner on Too Long (or Not Long Enough):** Timing is key! Leaving the cleaner on for too long can cause damage, while not leaving it on long enough can result in ineffective cleaning. Stick to the recommended time frame. Also, consider the temperature; if it’s very cold where you’re cleaning, it will probably take a little longer than the high end of the timing range.
* **Incomplete Removal:** Failing to thoroughly remove all traces of the cleaner can leave a sticky, unpleasant residue and potentially release harmful fumes when the oven is heated. Rinse, rinse, rinse! Use a clean, damp cloth or sponge and wipe multiple times to ensure all residue is gone.
* **Grease Buildup is too Thick:** Extreme grease buildup requires a multi-stage approach. You must get rid of some of the excess with scrapers before cleaning.
* **Lack of a Neutralizer:** After you have tried to break up oven cleaner you need to neutralize the remaining chemical reaction by carefully removing all the residue. Some people mix a solution of vinegar and water in a spray bottle for this process.
[Explore Top Rated break up oven cleaner on Amazon.]
## The Solution Section: Restoring the Peace (and Your Oven!)
Now, for the good news: your oven is salvageable! The “break up oven cleaner” situation *can* be fixed. Here’s how to address the most common problems and get your oven back on track.
### Step 1: Ventilation is Vital
Before you do anything else, maximize ventilation. Open windows and doors to allow fresh air to circulate. A cross breeze is ideal. If you have a fan, use it to exhaust the fumes. Wear rubber gloves to protect your hands and a mask to protect your lungs from the fumes.
### Step 2: Assess the Damage (and Choose Your Weapon!)
Take a close look at your oven. What’s the primary issue? Sticky residue? Lingering odor? Baked-on grease? This will help you determine the best course of action. If you damaged the oven, you will need to use more patience and less concentrated cleaners in further steps. Here are a few options:
* **Vinegar and Baking Soda Paste:** A natural and effective solution for removing sticky residue and neutralizing odors.
* **Dish Soap and Warm Water:** A gentle yet effective cleaner for removing light grease and grime. Dawn dish soap is a favorite.
* **Oven-Safe Cleaner Specifically Designed for Residue Removal:** If the problem persists, consider a specialized oven cleaner designed to remove residue from previous cleaning attempts, like the *Carbona 2-in-1 Oven Rack & Grill Cleaner*.
### Step 3: The Baking Soda and Vinegar Rescue Mission
This is a great solution for most oven cleaning problems. Here’s a step-by-step guide using the humble but mighty combination of baking soda and vinegar.
1. **Remove Loose Debris:** Use a plastic scraper or spatula to remove any loose food particles or debris from the oven.
2. **Make a Baking Soda Paste:** In a bowl, mix 1/2 cup of baking soda with a few tablespoons of water to form a thick paste.
3. **Apply the Paste:** Spread the paste evenly throughout the oven interior, focusing on areas with residue or stains.
4. **Let it Sit:** Allow the paste to sit for at least 12 hours, or preferably overnight. This gives the baking soda time to absorb the grease and grime.
5. **Scrub-a-Dub-Dub:** After the paste has sat, use a damp sponge or cloth to scrub the oven interior. The baking soda will help loosen the residue. For stubborn spots, use a scrubbing brush.
6. **Vinegar Power:** Fill a spray bottle with white vinegar. Spritz the baking soda paste with vinegar. This will cause a fizzing reaction, which further helps to lift the residue.
7. **Wipe Clean:** Use a clean, damp cloth to wipe away the baking soda and vinegar mixture. Rinse the cloth frequently with warm water.
8. **Repeat if Necessary:** For heavily soiled ovens, you may need to repeat the process.
### Step 4: Soap and Water Salvation
If the baking soda and vinegar method doesn’t completely solve the problem, try a solution of dish soap and warm water.
1. **Prepare the Solution:** Mix a few drops of dish soap with warm water in a bucket or bowl.
2. **Apply the Solution:** Use a sponge or cloth to apply the solution to the oven interior.
3. **Scrub Gently:** Scrub the oven gently to remove any remaining residue.
4. **Rinse Thoroughly:** Rinse the oven thoroughly with clean water to remove all traces of soap.
5. **Dry:** Use a clean, dry cloth to dry the oven interior.
### Step 5: The Power of Steam
Steam is a fantastic way to loosen stubborn residue. There are a few ways to generate steam in your oven:
* **Boiling Water Method:** Place a pot or baking dish filled with water in the oven. Preheat the oven to a low temperature (around 200°F) and let the water simmer for about 30 minutes. The steam will help loosen the residue. After 30 minutes, turn off the oven and let it cool slightly before wiping away the loosened residue.
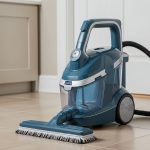
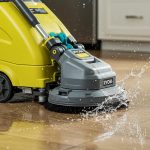
* **Commercial Steam Cleaners:** Several commercial steam cleaners are specifically designed for oven cleaning. These cleaners use pressurized steam to remove grease and grime effectively.
### Step 6: The “Tools for the Job” Section:
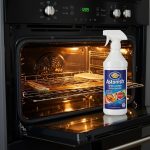
This is where our product recommendation comes in! After you have done your initial cleaning, there are a few products that can help you tackle the leftover grease and grime.
The **Carbona 2-in-1 Oven Rack & Grill Cleaner** stands out as a reliable choice.
* **Why it’s helpful:** The Carbona cleaner is especially useful for oven owners dealing with burnt-on residue from previous oven cleaning attempts because it is formulated to remove baked-on grease, food spills, and general grime without harsh chemicals.
* **Key Features:** It has an easy-to-use spray foam application that clings to surfaces, allowing it to penetrate into the grime, helping to lift the residue for easier cleaning.
Another helpful product is a good scrub brush.
* **Why it’s helpful:** A good scrub brush will give you a solid grip and allow enough pressure to help scrape away the grease and grime.
* **Key Features:** Look for brushes with ergonomic handles for comfortable grip and stiff, heat-resistant bristles for efficient scrubbing, such as the *OXO Good Grips Deep Clean Brush Set*.
### Step 7: Neutralizing Lingering Odors
Even after removing the visible residue, you might still notice a lingering chemical odor. Here are a few ways to neutralize those unpleasant scents:
* **Baking Soda Bowl:** Place a bowl of baking soda in the oven overnight to absorb odors.
* **Coffee Grounds:** Similar to baking soda, coffee grounds can also absorb odors. Place a bowl of dry coffee grounds in the oven overnight.
* **Lemon Juice:** Heat oven-safe bowl filled with lemon juice in the oven on low heat for an hour.
### Step 8: Prevention is Key
Once you’ve restored your oven, prevent future cleaning disasters by wiping up spills immediately and cleaning the oven regularly.
[Explore Top Rated break up oven cleaner on Amazon.]
## What to Look For in a *Good* Oven Cleaner (So You Don’t Break Up Again!)
Now that you’ve been through the wars, you’re probably wondering how to choose an oven cleaner that won’t betray you. Here’s what to look for when selecting an oven cleaner:
* **Read the Label Carefully:** Make sure the cleaner is suitable for your type of oven (self-cleaning or conventional).
* **Prioritize Safety:** Choose cleaners with low VOCs (volatile organic compounds) and non-toxic ingredients.
* **Look for Residue-Free Formulas:** Opt for cleaners that are specifically designed to leave minimal residue.
* **Consider Customer Reviews:** Read online reviews to see what other users have to say about the cleaner’s effectiveness and ease of use.
* **Natural or Chemical?** Do your research and know the tradeoffs. Natural oven cleaners help you avoid harsh chemicals, but might not get rid of all grime on their own. Chemical oven cleaners make the job faster but require extra care to keep your oven, and yourself, safe.
[Explore Top Rated break up oven cleaner on Amazon.]
## Final Verdict: You *Can* Save Your Oven (and Your Sanity!)
So, can you restore your relationship with your oven after an oven cleaner break-up? Absolutely! By understanding the reasons why things went wrong, following these easy steps, and choosing the right products, you can reclaim your oven and enjoy delicious home-cooked meals once again. Don’t give up hope! Your oven – and your taste buds – will thank you.
[Shop Budget-Friendly break up oven cleaner on Amazon.]