1")
[Check Latest Arrivals vinyl floor polish on Amazon.]
# Vinyl Floor Polish: The Ultimate Guide to Sparkling Floors (2026)
Want to bring the shine back to your vinyl floors? You’re in the right place! Vinyl floors are fantastic – durable, affordable, and stylish. But they can lose their luster over time. The good news? With the right vinyl floor polish, you can restore that like-new gleam and protect your floors for years to come. This ultimate guide walks you through everything you need to know, so you can achieve sparkling, beautiful vinyl floors in 2026 and beyond.
[Explore Top Rated vinyl floor polish on Amazon.]
## Understanding the Need for Vinyl Floor Polish
Before diving into specific products and techniques, let’s understand why vinyl floor polish is so important. Vinyl floors, especially those in high-traffic areas, are subject to daily wear and tear. This wear can manifest as:
* **Scratches:** Minor scratches from shoes, furniture, and pets can accumulate, dulling the overall appearance.
* **Scuffs:** These marks are often caused by rubber soles or heavy objects being dragged across the floor.
* **Fading:** Exposure to sunlight can cause vinyl floors to fade over time, losing their vibrancy.
* **Dirt and Grime Buildup:** Even with regular cleaning, dirt and grime can become embedded in the pores of the vinyl, creating a dull and dirty look.
Vinyl floor polish acts as a protective layer against these factors. It fills in minor scratches, creates a barrier against scuffs and stains, and enhances the inherent shine of the vinyl. Regular polishing not only improves the appearance of your floors but also extends their lifespan by preventing further damage.
[Explore Top Rated vinyl floor polish on Amazon.]
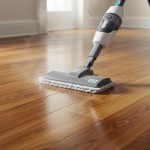
## Step-by-Step Guide to Polishing Your Vinyl Floors
Ready to transform your dull vinyl floors into sparkling showstoppers? Here’s a step-by-step guide to achieving professional-looking results.
### Step 1: Gather Your Supplies
Before you start, make sure you have everything you need:
* **Vinyl Floor Cleaner:** A pH-neutral cleaner specifically designed for vinyl floors. Avoid harsh chemicals like bleach or ammonia.
* **Vinyl Floor Polish:** Choose a high-quality polish suitable for your type of vinyl flooring (more on this later).
* **Two Buckets:** One for clean water and one for your cleaning solution.
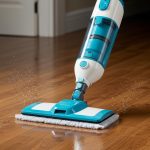
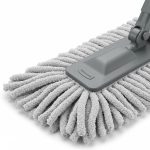
* **Mop:** A microfiber mop is ideal for gentle yet effective cleaning.
* **Soft Cloths:** For applying the polish.
* **Vacuum Cleaner:** To remove loose dirt and debris.
* **Safety Gloves:** To protect your hands from chemicals.
### Step 2: Prepare the Floor
Thorough preparation is crucial for optimal results.
1. **Clear the Area:** Remove all furniture, rugs, and other items from the floor.
2. **Vacuum:** Vacuum the entire floor to remove loose dirt, dust, and debris. Pay attention to corners and edges.
3. **Clean the Floor:** Mix your vinyl floor cleaner with water according to the manufacturer’s instructions. Using your microfiber mop, thoroughly clean the floor.
4. **Rinse:** Use a separate bucket of clean water to rinse the floor, removing any remaining cleaning solution.
5. **Dry:** Allow the floor to dry completely before proceeding. This may take several hours. A fan can help speed up the drying process.
### Step 3: Apply the Vinyl Floor Polish
Now for the main event!
1. **Read the Instructions:** Carefully read the manufacturer’s instructions on your chosen vinyl floor polish. Application methods can vary slightly between brands.
2. **Test in an Inconspicuous Area:** Before applying polish to the entire floor, test it in a small, hidden area to ensure it doesn’t discolor or damage the vinyl.
3. **Apply a Thin, Even Coat:** Using a soft cloth or mop, apply a thin, even coat of polish to the floor. Avoid applying too much polish, as this can lead to streaks or a sticky residue. Work in sections, overlapping each section slightly.
4. **Allow to Dry:** Let the polish dry completely according to the manufacturer’s instructions. This typically takes 30-60 minutes. Avoid walking on the floor during this time.
5. **Apply a Second Coat (Optional):** For extra shine and protection, you can apply a second coat of polish. Allow the first coat to dry completely before applying the second.
### Step 4: Maintain Your Sparkling Floors
Once your floors are polished, regular maintenance is key to keeping them looking their best.
* **Sweep or Vacuum Regularly:** Sweep or vacuum the floor at least once a week to remove loose dirt and debris.
* **Clean Up Spills Immediately:** Wipe up spills as soon as they occur to prevent staining.
* **Use a pH-Neutral Cleaner:** When cleaning your floors, always use a pH-neutral cleaner specifically designed for vinyl.
* **Avoid Harsh Chemicals:** Never use harsh chemicals like bleach, ammonia, or abrasive cleaners on your vinyl floors.
* **Re-Polish as Needed:** Depending on the amount of traffic the floor receives, you may need to re-polish it every few months to maintain its shine.
[Explore Top Rated vinyl floor polish on Amazon.]
## Tools for the Job: Recommended Vinyl Floor Polishes
To make the job easier (and deliver even better results), here are a couple of our favorite vinyl floor polishes with key features that really make a difference:
1. **Rejuvenate All Floors Restorer and Polish**
* **Best For:** Those wanting a quick and easy solution, suitable for all floor types including vinyl, laminate, and hardwood.
* **Key Features:**
* **Film-forming polymers:** Delivers a long-lasting shine and protection.
* **Easy to apply:** Just pour and mop, no buffing required.
* **Fills in micro-scratches:** Visibly reduces imperfections, restoring a new look.
* **Why We Like It:** Rejuvenate makes the application process simple, and the results are noticeable. The product efficiently fills in minor scratches, providing an instant face-lift to your floors. It’s an excellent choice for those who want convenience without sacrificing quality.
2. **Weiman High-Traffic Hardwood Floor Polish & Restorer**
* **Best For:** High-traffic areas needing extra protection and shine.
* **Key Features:**
* **Micro-filling technology:** Fills in scratches and protects floors from future damage.
* **Long-lasting formula:** Provides a durable coating that withstands heavy use.
* **Adds a protective layer:** Guards against scuffs and stains, extending the floor’s life.
* **Why We Like It:** Weiman’s polish is specifically made to handle the wear and tear of high-traffic areas. Its ability to fill in scratches effectively and provide a long-lasting protective layer makes it a superior choice for maintaining the beauty of your vinyl floors in demanding environments.
Choosing the right product depends on your specific needs. Both polishes excel in protection and restoration, ensuring your floors stay beautiful and durable for years to come.
[Explore Top Rated vinyl floor polish on Amazon.]
## Pro Tips & FAQs for Vinyl Floor Polishing
Here are some helpful tips and answers to common questions to ensure a smooth and successful polishing experience:
* **How often should I polish my vinyl floors?**
* The frequency depends on the amount of traffic the floor receives. In high-traffic areas, you may need to polish every 2-3 months. In lower-traffic areas, you may only need to polish every 6-12 months.
* **Can I use any type of floor polish on vinyl?**
* No, you should only use polishes specifically designed for vinyl floors. Other types of polishes may damage or discolor your vinyl.
* **How do I remove old wax buildup from my vinyl floors?**
* You can use a wax stripper specifically designed for vinyl floors. Follow the manufacturer’s instructions carefully.
* **What if I get streaks after polishing?**
* Streaks are often caused by applying too much polish or not spreading it evenly. Try diluting the polish with water or using a microfiber cloth to even out the application.
* **Can I polish luxury vinyl tile (LVT)?**
* Yes, most luxury vinyl tile (LVT) floors can be polished. However, it’s always a good idea to check with the manufacturer to ensure that polishing is recommended.
* **How do I prevent scratches on my vinyl floors?**
* Use rugs or mats in high-traffic areas, place felt pads under furniture legs, and avoid wearing shoes with hard soles indoors.
[Explore Top Rated vinyl floor polish on Amazon.]
## Conclusion: Achieve Sparkling Vinyl Floors in 2026
So, can you achieve sparkling floors with vinyl floor polish? Absolutely! By following this ultimate guide, choosing the right vinyl floor polish, and maintaining your floors regularly, you can keep them looking beautiful and protect them from wear and tear for years to come. With dedication and the right products, you can easily achieve a gleam that makes your home feel fresh and inviting. Go ahead, give your floors the TLC they deserve and enjoy the results!
[Shop Budget-Friendly vinyl floor polish on Amazon.]